Pages

Tuesday, November 25, 2014

Beginning of the year

First day of Pre-K is always scary for the itty-bitty people. Some have never been to a school and even those who have been in a daycare find it a little scary. Anxiety is in the air for first few days- everything is new. Bright from the Start suggests some activities to use in order to help students get familiar to classroom, to the teachers and each other. They are pretty simple activities with low prep requirement. 

First thing first... PICTURE.....Very important to click pictures of students the very first day.... all season teachers know this....doesn't matter what grade you are in....you never know when you might need their pictures. While we took normal pictures....I also decided to create a cute little frame which says 1st day of Pre-K.... Students held the frame and gave some cute smiles :)


I just used a 16" x 20" black matting (from Michaels framing department--with coupon cost around 7$) I hand cut the letters and used star punch to punch out some glitter stars. I intend to use the frame for 100th day of school and Last day as well. 

I also took pictures without the frame to be used in the classroom. Insert individual pictures in word document .... I put 6 pics per child on a page (sized it to 2" x2") and make a Class Pic document. We used the pics to make -Sign in sticks, picture on cubby, small groups cards, question of the day cards, Friend of mine book and Who do you see book.

HOW DO WE SIGN IN/OUT?
We have 2 tin round tin containers (borrowed from our lunch room- washed and cleaned well). One is labeled Home, and other is labeled School. We got some Paint stirrers from ACE Hardware (They have longer ones....and they are gracious enough to donate for classrooms.... most Hardware stores do). 

Stick the child's picture on the stick using clear tape and write their name on it. Children move their stick from Home bucket to School bucket when they come in and vice-versa when they leave at the end of the day.


SMALL GROUP CARDS:
When we start most children can recognize their names, but there are few who still do not know how their names look like. So we start the year with picture cards. I have pocket charts corresponding to our table colors.... whichever pocket their picture is in, they will be going to that table for the day. 
Most children take few days to understand this.... I introduced small groups in Week 3.... We are in Week 8 now and all the students know how to read the small groups chart and go to their designated tables.

QUESTION OF THE DAY CARDS:
This year I started Question of the Day....Students make choice, then we analyze- count how many votes for each option, which has the most, which has the least and Discuss about the topic. I started with Yes/No questions and intend to move on to Questions with 2-3 choices to choose from. 


As soon as students come in, wash hands and sign in....they come to the carpet and answer the question. While they listen and respond to the question, they tend to also come up with past experience stories or ask inquiry questions (whichever is applicable).

In 2nd half of school year, we will switch out picture cards and have name cards for them. 

FRIEND OF MINE BOOK: 
This is a book suggested by Bright from the Start. This helps children learn friends name and get familiar with everyone. It is a simple book with a song that has repetitive words so they can read it to themselves once you have read to them.


 ___________ is a friend of mine, 
friend of mine, friend of mine.
 ___________ is a friend of mine, 
in our Pre-K classroom. 

Create a page for each child. Bind the book together and read it to them. Once Ms. J created the book, we read the book everyday for few weeks for them to get to know everyone's name. I used it as a transition activity (getting up from carpet to wash hands for breakfast and lunch). They love seeing their pictures and eventually join in the singing. Now that they know their friends name...they just enjoy reading and singing it. 

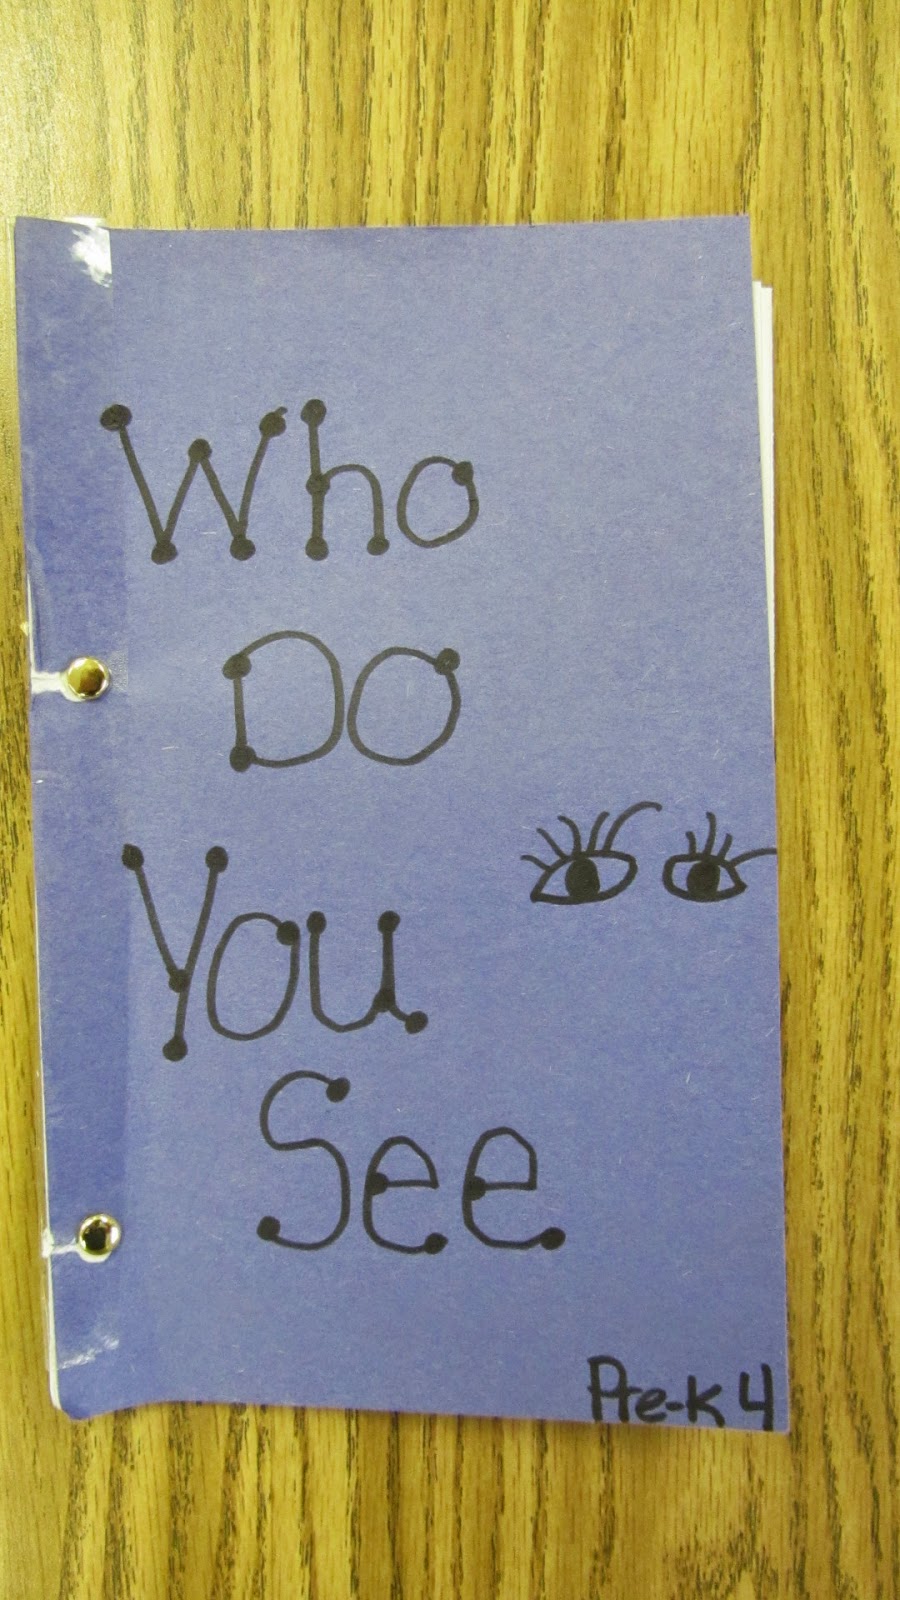
WHO DO YOU SEE BOOK?
This is similar to Brown Bear, Brown Bear who do you see. This Eric Carle book is very popular amongst the new kiddos. Most have heard it before and all enjoy the repetitive words and it makes them feel happy that they can read it.


__________, ___________ Who do you see?
(PICTURE OF CHILD)
I see (Name of child whose picture is in next page) looking at me.


Again, I used this book as a transition activity once we introduced it. After we used it several times, we changed it up a little. Instead of reading the book- I 
say a child's name and ask them "Joe, Joe, Who do you see?" Joe has to stand up and pick a friend and say their name "I see Jane looking at me." While Joe leaves to wash hands/line up, Jane stands up and the process repeats. Since they has started to learn friends name, it became fun for them and they enjoy picking out a friend. 

WHO STOLE THE COOKIE FROM THE COOKIE JAR?
This is another fun activity to learn name and use for transition. I got this idea from a webinar I watched about Back To School Strategies by DR. Jean on www.edweb.net I got a plastic container from the dollar store and printed some cookies outline. I colored the cookies in and wrote a child's name on each cookie. 

When ready to transition.... I pull out the cookie jar....sing 
"Who stole the cookie from the cookie jar." (Pull out a name)
"Joe stole from the cookie jar. "
Joe: "who me"
T: "Yes you"
Joe: "Couldn't be"
T: "Then Who" 
(pull out another cookie while joe goes to wash hands or line up)

Eventually I intend to take away pulling out cookies and let them choose. They love it when the cookie jar is pulled out and their name is called out. 

I AM LOOKING THROUGH THE WINDOW:
This is another of Dr. Jean activity form the webinar mentioned above. All you need is a simple frame (I found mine at Michaels in the clearance section for $2). I decorated it with some Jewels to make it fun and pretty. 


The song:
I'm looking through my window,
and I see my friend _________. 

We sat in a circle, and I started the song holding the frame to my face using name of the child sitting on my left. Then I gave the child the frame and we sang the song and used the name of the child sitting next to the 1st child and we continued till all names were called out in the song. Every child got to hold the frame as well. They were just super excited to look through the window :D

SITTING ON CARPET SONG
I found this song (can't remember where :( YIKES!!) to get student attention and get them sitting right on the carpet. 

Crisscross applesauce clap clap clap
Eyes on the teacher 
(point to own eyes and then point in the front, so they will be pointing to you.)
Hands in your lap
(raise hands and put in lap)

We sing it 3 times and sometimes 4 times (depending on how noisy we have been). Every time we sing, we decrease our volume bringing it to a whisper. I never thought, but my kiddos love this song and get to their spots quickly and start singing.

BEHAVIOR MANAGEMENT:
Idea #1
I decided to use ticket system this year. Last year I did stickers and we had stickers everywhere in the classroom :( and then I made weekly sheets for them.... but that was a daunting task too. So I decided to go with tickets.

I found these cute boxes in dollar store which had 2 snap closures on the sides. Each child has a container with their name labeled on it. I also found these cute colored shoe box style boxes (lidless) in Target Dollar Bins.... red, blue and yellow. So when a child earns ticket, they open their container, put their ticket in and put the container in their assigned box.  
They can earn 2 tickets a day. I ticket in the morning and 1 in the afternoon. We remind ourselves of the class rules, about earning tickets and ways we can earn them. Everyone ends up getting 2 tickets.... most of the time.....some of them earn and extra or 2 for making some choices without teachers having to tell them or for being extra kind or nice to friends. Sometimes if they do not make good choices at all.... they might end up loosing tickets too.

On Friday, they count the tickets and get to go to the treasure box. In my treasure box I have some toys from dollar store....party favors like yo yo, springs, noisemakers, etc.... I have different values assigned to all the items- 3, 5, 7, 10, 15, 20. They need minimum of 3 tickets to get to the box. 

We talk about saving tickets to get to bigger items, or using only certain tickets and getting small amount item.... We got some economics covered in this ;) (spending v/s saving; you need money to buy things--in our case tickets)
BEHAVIOR MANAGEMENT:
Idea #2
So while the above idea was doing well... at training I found about CLASSROOM DOJO .... an app that can be downloaded on your tablet or smart phone (IOS and Android) I have it on my Ipad and Samsung Phone! So once you create an account (its FREE) you can set your class in. It allows you to add behaviors you want to watch/assess- positive and negative. It is easy, fun and tends to get their attention when a friend is clicking in their Dojo points. Also it has parental log in (parents get access code) which allows them to access their child's behavior report. So we gave up the boxes and are doing classroom Dojo.
I set up 6 positive and 6 negative behaviors. While Positive behavior gives them a point, negative ones takes away one. Kiddos are trying hard to keep up with positive points. We must have barely clicked negative for a child or 2 ....maybe once. We are earning weekly 15 points in order to get to treasure box on Friday :) It keeps counting up.... so while week one had 15 as aim, in week 2 our aim was to get to the number 30 and so on. I display the number up somewhere around our carpet for them to remember. 

So this has been the beginning of the year...I know I am way behind.... but I intend to catch up..... Weekly theme ideas to start soon!

Until next time,

Happy Teaching,

Cheers =)

Monday, August 4, 2014

New School Year

So tomorrow we begin our new school year. We started last Tuesday and kiddos come tomorrow!! When I got this job last year, the school had been in session for almost month and half...so I did not get to be part of the beginning of the year training! This year will be first time I ever do that :D Nevertheless, I get to decorate our main area aka Circle time/Carpet Area... it has the main bulletin board where I get to display everyday things that we need to look through. 


This is our main bulletin board. Bright from the Start does not emphasize on Calendar... We do days of the week, months of the year (through song) and the date (morning message). Hence the simple calendar which stays up so we can countdown to special occasions (birthdays, Christmas, etc) 

The Weather Chart that you see hanging on the board (sorry for no close up!) came from Teachers Pay Teacher (FREEBIE). It has all the pieces that I put together on black cardstock/construction paper and laminated it. 


This little tattle chart came from The Silver Lining (Another Freebie).... It is  super cute chart which explains difference between tattling and something worth telling the teacher. The Kelso chart came from google images. I was going to find a turtle and called it Tattle Turtle... but since this chart has a frog... I bought a small frog and call him Tattle Kelso ;) 


Next I made my Birthday calendar.... So you must have seen all these cute little Classroom Birthday calendars on Pinterest....that is where I got this idea from. Now usually we display the months in the classroom...so this calendar serves dual purpose. All the supplies came from Michaels (use coupons and your teacher ID to get wonderful discounts). I bought two packs of 6 thin boards, 22 cupcakes, Black Chalkboard Paint. I had some yellow-green and various paints, sparkle glue and hole punch. I painted the cucpakes and board with chalkboard paint and decorated them. Some tack pins and s-hooks and our calendar hangs cute!


Next I made these pooh bear contact magnets for parents to take at open house. I simply found an image of Pooh I liked and copied to it Powerpoint file, enlarged it, added required text, laminated it and added some magnets at the back. It has teacher names, school number and class email. 


I also had these sign up sheets for parents.... easy way to collect email addresses and get permission to send them abcmouse requests. 


This brilliant idea came from my assistant Ms. J. We were at training and the speaker was talking about making class schedule... We were discussing about making a new one since the one we had last year was old. She said how about we make honey pots to go with our Pooh Bear theme :D ... I found a perfect honey pot, added clipart and required text! Easy peasy ;) Lamination is must!!


Last year we had a poster board with colored circles on top....I was not a fan of it...but we used it. Over summer I totally forgot about this until we went back for pre-planning and I remembered these pocket charts I had bought. Perfect colors to go with our small group tables :D Now all we have to do is click pictures and use the pictures so they know what table to go to... later in the year we change the pictures to names. 

So we got things in order.... set up everything way we planned... now time for the kiddos to come and for us to begin growing this year =)

Hope all of you have awesome school year this year!

Cheers =)


Saturday, March 8, 2014

Dr Seuss Week


March is Dr. Seuss month. His birthday is on March 2nd and so whole month of March is all about him. However we stuck to having a week on him :D We read a lot of his books- luckily I had 6 of them on tape so we listened to them. My kiddos love listening to books on tape and these have music and sound effects to go with the words. 

Rhyming Words:
Since Dr. Seuss books are all about rhyming we listened for rhyming words. After we finished reading the book, we tried to recall rhyming pairs and write them on chart. We did this throughout the week, every time after we read the book.


Rhyming Sentences:
Let students think of rhyming pairs and help them make sentences. As this is new to them, it will require some probing to get them thinking. 

 
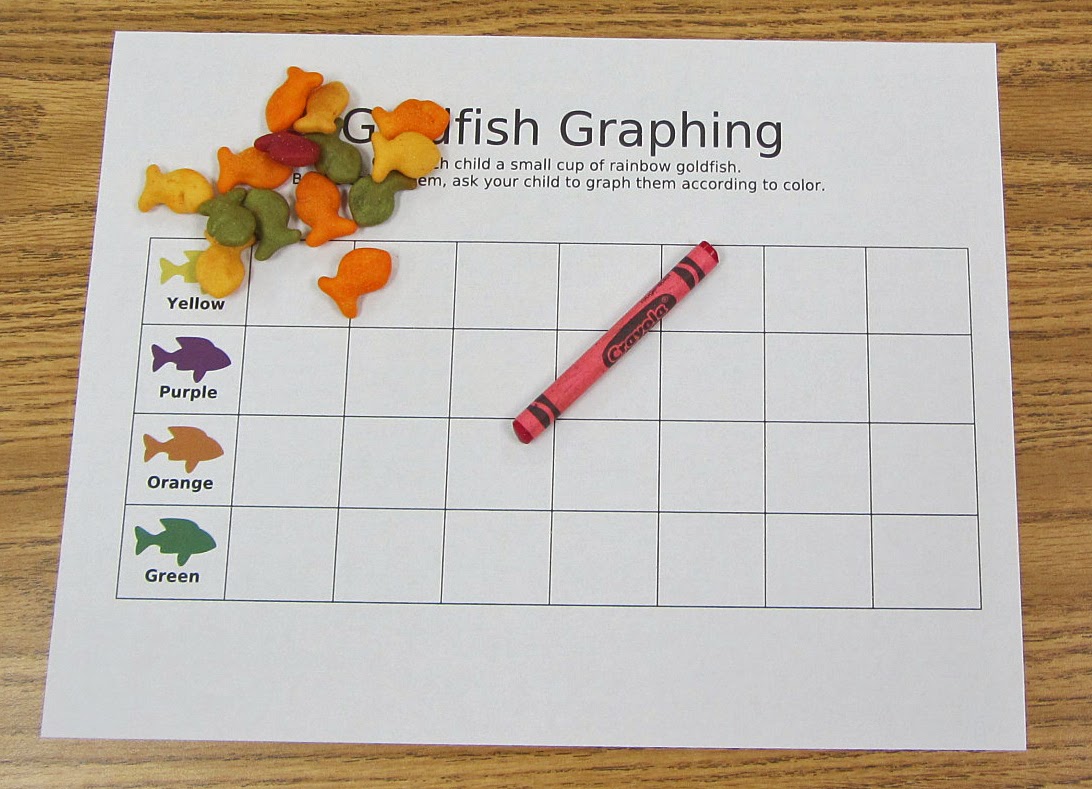
Goldfish Graphing:
A fun graphing activity. Provide students with a handful of Rainbow Goldfish and the graphing sheet. Students will sort the fishes according to the color and color in corresponding boxes. 


The graphing sheet is from Oopsey Daisy and can be found HERE


One fish two fish game:
A counting game, this is a fun game to play that goes with Dr. Seuss's One Fish, Two Fish, Red Fish, Blue Fish. I found the game on Mama Miss website and can be found HERE. This game can be used for color recoginition, counting, one to one correspondence or addition. We used it for adding by rolling 2 dies and putting equivalent fishes in our bowl and finding the total. 

Foot Measurement:
This idea is from Oopsey Daisy's Mommy school packet S is for Seuss. It goes with the Foot Book. We traced students foot on a paper and gave them unifix cubes to measure their foot. They wrote how many unifix cubes long their foot was and compared whose was the longest in the group. 

Puzzles:
I created clothes pin game to go with our theme. It can be downloaded from HERE.  
In Pre-K students should be able to number order upto 10. So I created puzzles that require the kiddos to put them in number order to put the puzzle together. 
Horton Puzzle
Lorax Puzzle
Thing 1 and 2 Puzzle
I also found green egg and ham clipart by searching on google. I wrote numbers on the eggs and put dots on the ham. Kiddos had to match the eggs and ham. 

Word Wall Words:
WE created simple words that we chose from Dr. Seuss's book. Click HERE to download them. 

Of course we had a Wacky Wednesday and Crazy Sock Friday. Made the whole week fun :))


Until next time,

Cheers =) 
Sunday, March 2, 2014

Valentine's week

Our theme was "All about Love" Our activities rotated around "Hearts"

Story Retelling:
We read the book "Marley Looks for Love" and students had to retell a scene from the story by drawing a picture.


Student Work


Student Work

Heart Addition:
I punched out some hearts to teach addition to my friends in small groups. This was our first time doing addition. I started by asking them to count hearts I placed in the middle. Then I tell them I am going to add 1 more and ask them to count again. I explained to them that they had just done addition and showed them the addition sentence on white board. We did a round of working with a partner and an individual round.


Student Work

Student work
Valentine Number Match:
This a cute little matching game that students can play individually. You can download it from Confessions of a Homeschoolers Blog by clicking HERE
vnumbermatch1

Valentines Flower Number Match:
Another game we used for our independent table is from this free download on Teachers Pay Teachers.           
                                Valentine's Day Preschool Theme Printables Pack                                   

Alphabet Match and Sound Recognition:
PreKinders has this wonderful Alphabet mats to use for Letter matching on their Valentine Theme page. She has Upper and Lower case mats as well one for beginning sound match. They are pretty with cute little hearts. 


                           Valentine          Valentine Letter Sounds Phonics

The Heart- Emergent Reader Book:
I also downloaded this Book from Pre-K Pages. It is a cute little book with simple sentences that we choral read. It uses sight words the and is and is on colors making it easier for kids to read on their own once you have read it together. (Scroll down to the bottom, the book is a freebie in the printable at the bottom.)
http://www.pre-kpages.com/valentine/

Ofcourse we had to have our class Valentine's Exchange a cute little party. Fabulous time after missing school for a week due to snow!!

Until next time,

Cheers =)

Wednesday, February 12, 2014

Dental Health

February is Dental Health Month. Through out the week we talked about importance of brushing and take care of your teeth and mouth. Following are some of the activities we did.

Teeth Counting Game:
(For small group)


This idea is from From the Hive


We made mouth using pink cardstock, cutting it in oval and folding it in half. We drew 10 circles on each half (Children have 20 teeth). The game was to roll the dice, read the number, put equivalent marshmallow teeths on their mouth mat.

Find the "T" words. 
(for Large groups)

This idea is also from From the Hive


We printed some words that begin with /T/ sound and some that did not. Students had to identify the picture and then tell if it begun with the /T/ sound or not. We glued those pictures on the Tooth, the others were discarded. Click HERE for the pictures we used.


Brush Brush Game:
(For small group)


This game is from Pre-K Pages

literacy dental 2
Brush Brush Game. Picture from Pre-K Pages
This game could be used to play with sight words, letters or numbers. We did alphabet recognition. We took a teeth clipart, expanded it to full page and printed off 5 copies to make 5 different bingo like mats and made copies of each of the mat. This way each child in the small group would have a different mat. I am sorry I do not have pic of it :(( I promise will become better about it :) We printed small teeth and hand wrote alphabets on them and Brush! Brush! on 3 cards. They sang Brush your teeth by Raffi if they picked that card.

Counting Cavities:
(For Small group-Independent, Math Center)

Cavities Magnifying Counting
Counting Cavities, Picture from Sorting Sprinkles

We took tooth clipart and printed 20 teeths. On each tooth, I made cavities (small black circles) and laminated them. Students had to count the cavities and write the number on it using Expo Marker. I also provided them with copies of number as they are still learning how to write them. 

Sorting Sprinkles also has a link to "Brushing Your Teeth" sequencing. This is another large group activity we did for students to understand sequencing, how activities happen in a certain order.

Good or Bad for my Teeth Sorting
( For Large Group or Small Group)

The blog linked about has PDF file of food items which can be sorted into good or bad for teeth. We created 2 tooths-one happy, one sad. Then we looked at each food item and decided if it was good or bad for our teeth. When we came to citrus foods, we talked about how it has something called acid and it removes the enamel layer of our tooth. 


Whose smile is it Book.
 (for Phonological Awareness)

Again I am not sure where I saw this idea and apologies to the person who originally shared this for being unable to mention you here. But we do thank you for this awesome little book. Click students pictures, just their smile and teeth. I got them printed and glued them on sized construction paper. Put all the pictures together to make a book. I then wrote "This smile belongs to _________." During PA time, we looked at the pictures, and kids immediately guessed who smile it was. I then wrote the names. Then we choral read the book.


Ms. A. created a Smile Book too. For her book, she just cut out the mouth area and in cute lip shape :)) I forgot to click a picture of her book.... but it looked super cute!

For Phonological Awareness, we also did a poem, "Brush Brush Your Teeth" from Alaboon. It is sung to Row row your boat. It is a super cute song and Pre-K 4 enjoyed singing it and we sang it everyday twice a day ;)

Ms. S from Pre-K 3 happened to have a video on brushing your teeth, so that was something exciting to watch. The video was by Colagate and is for children. Students loved watching  Dr. Rabbit who showed the right steps for brushing teeth.

Dental Word Wall Words-Click HERE

This is all for this week.

Until next time,

Cheers!

Monday, February 3, 2014

The Mitten Reenactment

 In Pre-K, "Retelling a story" is an important standard. Retelling can be done by simply recalling scenes from the story, or drawing a picture or reenactment using props. We decided to reenact "The Mitten".

The Mitten by Jan Brett is a very good book to read and is perfect if your theme of the week is "Winter". It is a story about a little boy who looses a mitten in snow and some animals make that mitten their home until the mitten stretches and pops. It is a cute little story about winter animals trying to get ready for their long sleep! There are few versions of this title.... and most of them have similar animals. 

We got our masks from Jan Brett's website . All you have to do is print them, laminate for longevity and use them. Pre-K 4 kiddos enjoyed it..... We did not have Jan Brett's version. Our version had just 5 animals, so we had to do this reenactment several times in order to give everyone a chance. 

Our version book came with CD. So we listened to the story during large group time. At this time we retold story by sequencing the events in the story. 


Later in the day, we did reenactment. We sat in a circle, and the 5 masked animal friends waited while Ms. J read the story.


As the animals were called, they got into the mitten (Blanket for us).


 We insisted they hold their masks up.... just for fun!! and the picture too ;)


As the mitten popped.. all the animals jumped out of the blanket and went back to their spots.

Kiddos loved waiting for each animal to get under the blanket and then for all 5 to pop out.... for them that was the most exciting part. However, 5 rounds later...... all kiddos could retell the story :D

A simple thing like reenactment makes learning so much fun. Lucky for us it was super cold that day, so this was perfect activity to keep us busy during our outside play time. 

Besides masks, using puppets or pictures glued on popsicle sticks make retelling fun!!

Until next time,

Cheers =)

Saturday, January 25, 2014

Instant Snow Experiment

The past week one of our small group activity was Instant Snow Experiment. The idea behind this experiment was to understand how adding water changed the powder into something new. Now ideally Insta Snow by Steve Spangler would be ideal...as the reaction is instant and the powder actually doubles very quickly. However, the brand I got was not Insta Snow...I bought mine from a local teacher supply store. Like I said, our key was for them to understand how adding water changed the original substance. 


For this experiment I had:
Instant Snow Powder
2 clear plastic cups ( 1 with water and 1 empty)
2 Bowls (1 lined with paper towel and the other empty)
Spoon
Measuring cup-1/4 cup
Recorder (optional)
Recording sheets - 1 per student. 

In the empty bowl we scooped out some powder for them to touch and see. I encouraged them to think about the color, what it looked like, how it felt. At this point I give them few seconds to draw out what the powder looked like before we added the water. After they drew, I asked them to describe what they drew. I wrote what they told me under the picture.

Next, I told them we were going to mix this powder with water. This snow powder required mixing 1/8 tsp of powder in 1/4 cup of water and stirring. I added a little more than 1/8 tsp so that the snow would form faster. (1/8tsp required for a longer stirring). 

As you start stirring, the water starts to slush up...


At this point, I ask them if they see any change.....most of them said they could see something floating in there.

As you keep stirring, this thing becomes thicker and thicker. However, this stuff did not turn into snow...it remained more like ice :(


So we scooped it out in the bowl... again I encouraged them to think about what happened to the powder, the color, and the texture. I asked them to draw how the powder looks after adding water and wrote what they told me under the picture. 


Some of the things they told me were:
Before: "It looks like salt", "It is crunchy", "It is white and soft", "It looks like soap powder."

After: Most of the students understood "the powder has become big", "It looks like Ice", "It is still white", "It looks like frost that we scrap from the car in the morning" 

Overall, the students could observe the change and see how adding water changed the powder. So I thought it was a pretty good experiment. However Insta Snow would have been more fun! (will be more proactive next year :D)

Our recording sheet was a simple sheet that Ms. A made and we made copies. We did this activity in small groups. So I used a recorder to record the whole conversation/experiment so I could go back and make notes to see who understood the concept.

Recording sheet:


Successful week for us :))

Until next time,

Cheers :)

Tuesday, January 21, 2014

Hershey Kisses 100 day Counting

Today was 100th day of school for us :)) It was exciting....

If you teach Pre-K in Georgia, you know that technically students are not required to know numbers beyond 20... however as a substitute I have seen teachers try and teach students numbers beyond 20 and students understanding the concept. Well so since this is my first year teaching Pre-K or celebrating 100th day of being in school... I really did not plan much or think of it much. 

We read 100th Day of School 

The 100th Day of School 

Next we talked about how what 100 looks like and that it is a big number. I pulled out my Hundreds Chart to show them how we start at one and count until 100. We talked about how long it would take to say all those numbers. 

Our Large group activity was Hershey Kisses Hundred's chart -idea from Kindergarten Happenings  I was going to make the hundreds chart, could not get to it. Instead bought hundreds chart from teacher supply store ($2.99) I had some colored circle stickers, wrote numbers on them and stuck them on the Kisses. 


We sat in a circle on the carpet and I called 2 students at one time to come to the carpet. Each one picked a candy and told us what numbers they had.... since my friends are still learning to recognize numbers 1-20, it was hard for them to tell what number it is, however they can recognize individual numbers- like 6 and 4 in 64 ( at this point I tell them this is number "64").


 Some of my friends could find the numbers easily and some needed the extra help. However, trying to get 21 Pre-K kiddos to sit is not an easy task. Infact after each one took turn, one of my friends asked "are we going to fill in all the numbers?" (my kiddos crack me up all the time). So we decided to stop. 


 After 24 turns, we were done. It was fun for them.... BUT there is a reason Pre-K kids sit at the carpet for only 15-20 mins a stretch!! Overall, the idea of Kisses with numbers was exciting for them, 100's chart however, too big for them. 

Happy 100th Day if you had yours today :))

Cheers =)