First day of Pre-K is always scary for the itty-bitty people. Some have never been to a school and even those who have been in a daycare find it a little scary. Anxiety is in the air for first few days- everything is new. Bright from the Start suggests some activities to use in order to help students get familiar to classroom, to the teachers and each other. They are pretty simple activities with low prep requirement.
First thing first... PICTURE.....Very important to click pictures of students the very first day.... all season teachers know this....doesn't matter what grade you are in....you never know when you might need their pictures. While we took normal pictures....I also decided to create a cute little frame which says 1st day of Pre-K.... Students held the frame and gave some cute smiles :)

I just used a 16" x 20" black matting (from Michaels framing department--with coupon cost around 7$) I hand cut the letters and used star punch to punch out some glitter stars. I intend to use the frame for 100th day of school and Last day as well.
I also took pictures without the frame to be used in the classroom. Insert individual pictures in word document .... I put 6 pics per child on a page (sized it to 2" x2") and make a Class Pic document. We used the pics to make -Sign in sticks, picture on cubby, small groups cards, question of the day cards, Friend of mine book and Who do you see book.
HOW DO WE SIGN IN/OUT?
We have 2 tin round tin containers (borrowed from our lunch room- washed and cleaned well). One is labeled Home, and other is labeled School. We got some Paint stirrers from ACE Hardware (They have longer ones....and they are gracious enough to donate for classrooms.... most Hardware stores do).

Stick the child's picture on the stick using clear tape and write their name on it. Children move their stick from Home bucket to School bucket when they come in and vice-versa when they leave at the end of the day.
SMALL GROUP CARDS:
When we start most children can recognize their names, but there are few who still do not know how their names look like. So we start the year with picture cards. I have pocket charts corresponding to our table colors.... whichever pocket their picture is in, they will be going to that table for the day.
 Most children take few days to understand this.... I introduced small groups in Week 3.... We are in Week 8 now and all the students know how to read the small groups chart and go to their designated tables.
QUESTION OF THE DAY CARDS:
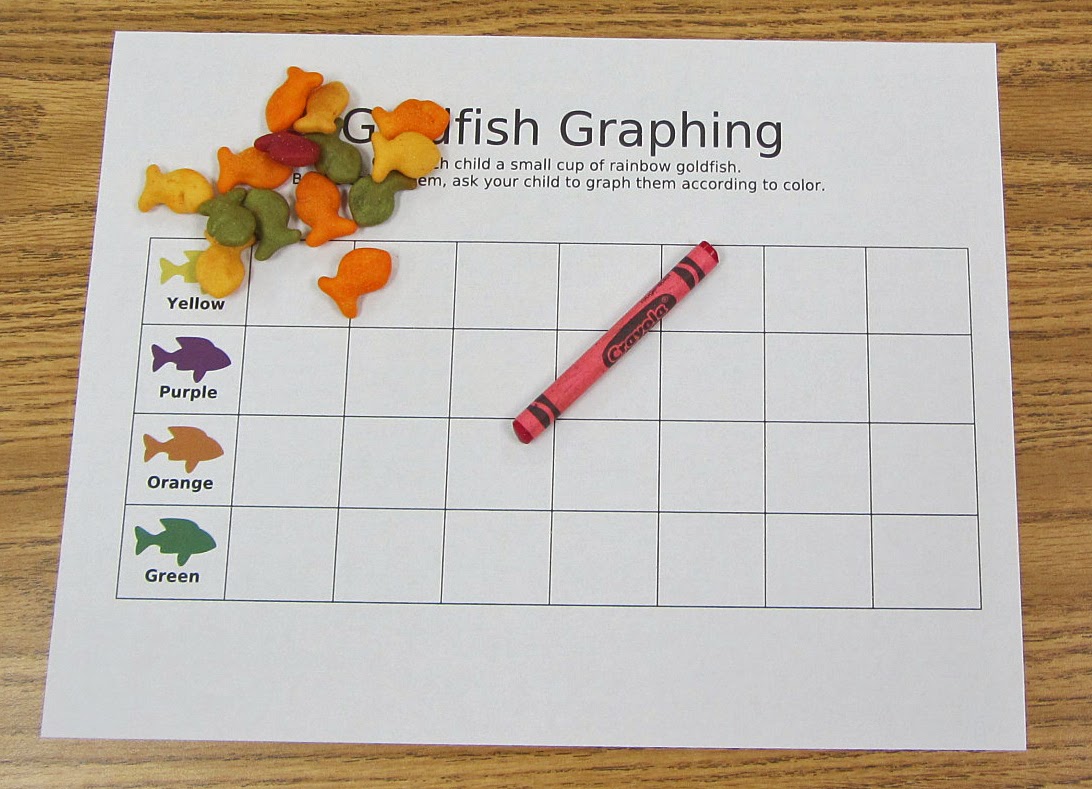
This year I started Question of the Day....Students make choice, then we analyze- count how many votes for each option, which has the most, which has the least and Discuss about the topic. I started with Yes/No questions and intend to move on to Questions with 2-3 choices to choose from.

As soon as students come in, wash hands and sign in....they come to the carpet and answer the question. While they listen and respond to the question, they tend to also come up with past experience stories or ask inquiry questions (whichever is applicable).
In 2nd half of school year, we will switch out picture cards and have name cards for them.
FRIEND OF MINE BOOK:
This is a book suggested by Bright from the Start. This helps children learn friends name and get familiar with everyone. It is a simple book with a song that has repetitive words so they can read it to themselves once you have read to them.


First thing first... PICTURE.....Very important to click pictures of students the very first day.... all season teachers know this....doesn't matter what grade you are in....you never know when you might need their pictures. While we took normal pictures....I also decided to create a cute little frame which says 1st day of Pre-K.... Students held the frame and gave some cute smiles :)
I just used a 16" x 20" black matting (from Michaels framing department--with coupon cost around 7$) I hand cut the letters and used star punch to punch out some glitter stars. I intend to use the frame for 100th day of school and Last day as well.
I also took pictures without the frame to be used in the classroom. Insert individual pictures in word document .... I put 6 pics per child on a page (sized it to 2" x2") and make a Class Pic document. We used the pics to make -Sign in sticks, picture on cubby, small groups cards, question of the day cards, Friend of mine book and Who do you see book.
HOW DO WE SIGN IN/OUT?
We have 2 tin round tin containers (borrowed from our lunch room- washed and cleaned well). One is labeled Home, and other is labeled School. We got some Paint stirrers from ACE Hardware (They have longer ones....and they are gracious enough to donate for classrooms.... most Hardware stores do).
Stick the child's picture on the stick using clear tape and write their name on it. Children move their stick from Home bucket to School bucket when they come in and vice-versa when they leave at the end of the day.
SMALL GROUP CARDS:
When we start most children can recognize their names, but there are few who still do not know how their names look like. So we start the year with picture cards. I have pocket charts corresponding to our table colors.... whichever pocket their picture is in, they will be going to that table for the day.
QUESTION OF THE DAY CARDS:
This year I started Question of the Day....Students make choice, then we analyze- count how many votes for each option, which has the most, which has the least and Discuss about the topic. I started with Yes/No questions and intend to move on to Questions with 2-3 choices to choose from.
As soon as students come in, wash hands and sign in....they come to the carpet and answer the question. While they listen and respond to the question, they tend to also come up with past experience stories or ask inquiry questions (whichever is applicable).
In 2nd half of school year, we will switch out picture cards and have name cards for them.
FRIEND OF MINE BOOK:
This is a book suggested by Bright from the Start. This helps children learn friends name and get familiar with everyone. It is a simple book with a song that has repetitive words so they can read it to themselves once you have read to them.
___________ is a friend of mine,
friend of mine, friend of mine.
___________ is a friend of mine,
in our Pre-K classroom.

Create a page for each child. Bind the book together and read it to them. Once Ms. J created the book, we read the book everyday for few weeks for them to get to know everyone's name. I used it as a transition activity (getting up from carpet to wash hands for breakfast and lunch). They love seeing their pictures and eventually join in the singing. Now that they know their friends name...they just enjoy reading and singing it.
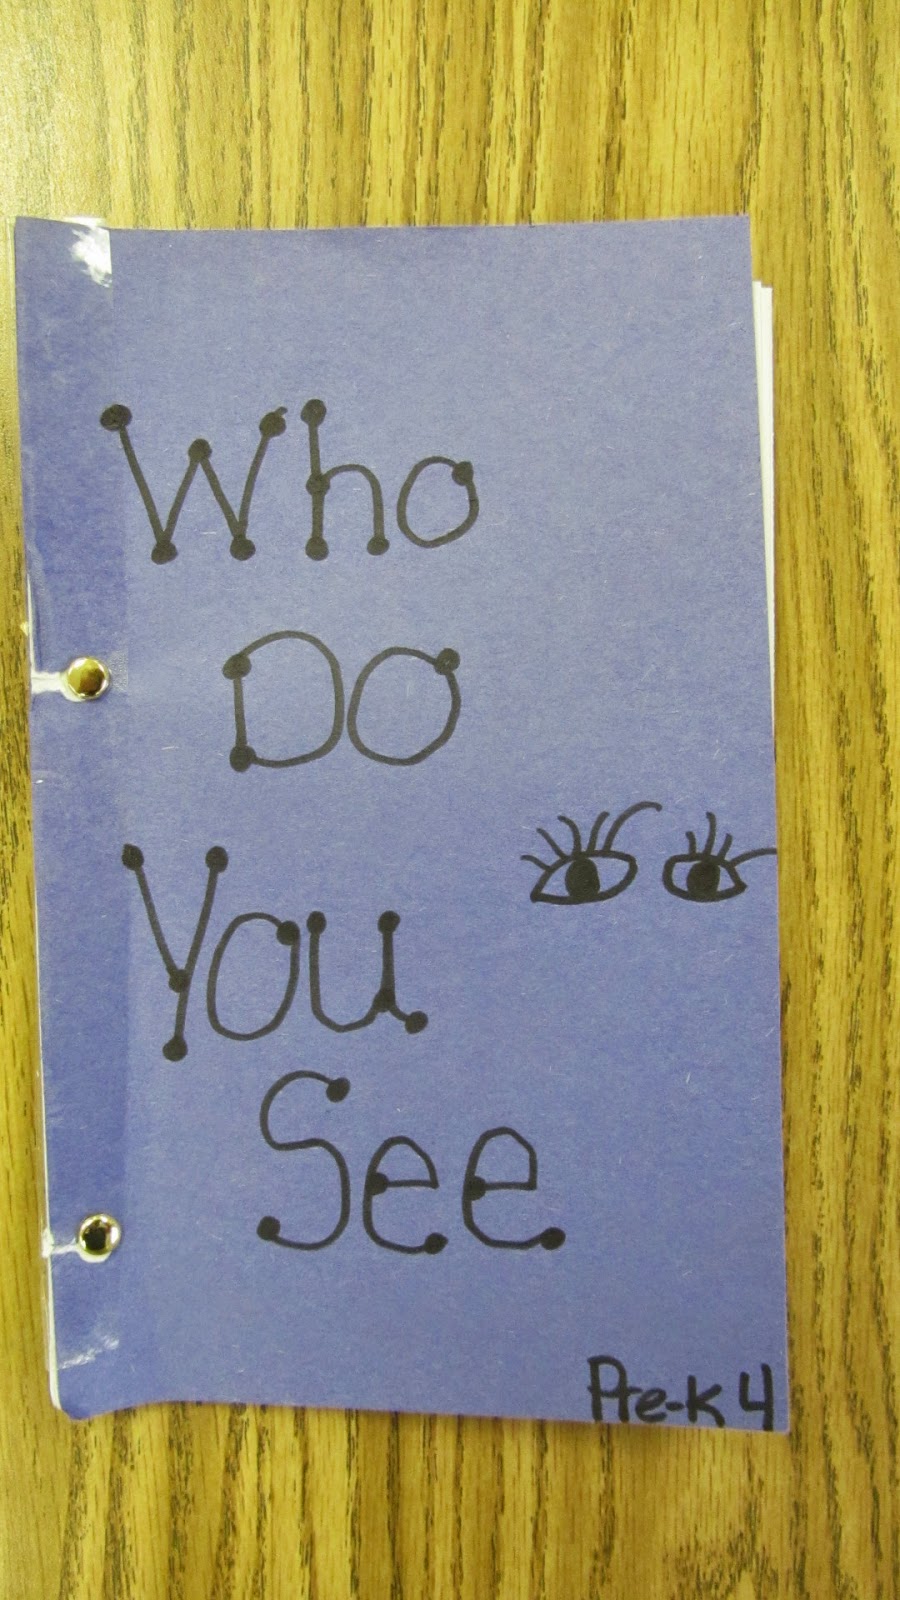
WHO DO YOU SEE BOOK?
This is similar to Brown Bear, Brown Bear who do you see. This Eric Carle book is very popular amongst the new kiddos. Most have heard it before and all enjoy the repetitive words and it makes them feel happy that they can read it.
__________, ___________ Who do you see?
(PICTURE OF CHILD)
I see (Name of child whose picture is in next page) looking at me.
Again, I used this book as a transition activity once we introduced it. After we used it several times, we changed it up a little. Instead of reading the book- I
 say a child's name and ask them "Joe, Joe, Who do you see?" Joe has to stand up and pick a friend and say their name "I see Jane looking at me." While Joe leaves to wash hands/line up, Jane stands up and the process repeats. Since they has started to learn friends name, it became fun for them and they enjoy picking out a friend.
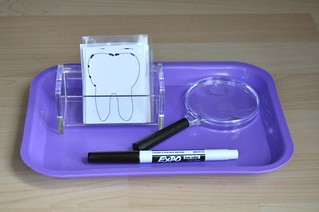
WHO STOLE THE COOKIE FROM THE COOKIE JAR?
This is another fun activity to learn name and use for transition. I got this idea from a webinar I watched about Back To School Strategies by DR. Jean on www.edweb.net I got a plastic container from the dollar store and printed some cookies outline. I colored the cookies in and wrote a child's name on each cookie.
When ready to transition.... I pull out the cookie jar....sing
"Who stole the cookie from the cookie jar." (Pull out a name)
"Joe stole from the cookie jar. "
Joe: "who me"
T: "Yes you"
Joe: "Couldn't be"
T: "Then Who"
(pull out another cookie while joe goes to wash hands or line up)
Eventually I intend to take away pulling out cookies and let them choose. They love it when the cookie jar is pulled out and their name is called out.
I AM LOOKING THROUGH THE WINDOW:
This is another of Dr. Jean activity form the webinar mentioned above. All you need is a simple frame (I found mine at Michaels in the clearance section for $2). I decorated it with some Jewels to make it fun and pretty.
The song:
I'm looking through my window,
I'm looking through my window,
I'm looking through my window,
and I see my friend _________.
We sat in a circle, and I started the song holding the frame to my face using name of the child sitting on my left. Then I gave the child the frame and we sang the song and used the name of the child sitting next to the 1st child and we continued till all names were called out in the song. Every child got to hold the frame as well. They were just super excited to look through the window :D
SITTING ON CARPET SONG:
I found this song (can't remember where :( YIKES!!) to get student attention and get them sitting right on the carpet.
Crisscross applesauce clap clap clap
Eyes on the teacher
(point to own eyes and then point in the front, so they will be pointing to you.)
Hands in your lap
(raise hands and put in lap)
We sing it 3 times and sometimes 4 times (depending on how noisy we have been). Every time we sing, we decrease our volume bringing it to a whisper. I never thought, but my kiddos love this song and get to their spots quickly and start singing.
BEHAVIOR MANAGEMENT:
Idea #1
Idea #1
I decided to use ticket system this year. Last year I did stickers and we had stickers everywhere in the classroom :( and then I made weekly sheets for them.... but that was a daunting task too. So I decided to go with tickets.
I found these cute boxes in dollar store which had 2 snap closures on the sides. Each child has a container with their name labeled on it. I also found these cute colored shoe box style boxes (lidless) in Target Dollar Bins.... red, blue and yellow. So when a child earns ticket, they open their container, put their ticket in and put the container in their assigned box.
They can earn 2 tickets a day. I ticket in the morning and 1 in the afternoon. We remind ourselves of the class rules, about earning tickets and ways we can earn them. Everyone ends up getting 2 tickets.... most of the time.....some of them earn and extra or 2 for making some choices without teachers having to tell them or for being extra kind or nice to friends. Sometimes if they do not make good choices at all.... they might end up loosing tickets too.
On Friday, they count the tickets and get to go to the treasure box. In my treasure box I have some toys from dollar store....party favors like yo yo, springs, noisemakers, etc.... I have different values assigned to all the items- 3, 5, 7, 10, 15, 20. They need minimum of 3 tickets to get to the box.
We talk about saving tickets to get to bigger items, or using only certain tickets and getting small amount item.... We got some economics covered in this ;) (spending v/s saving; you need money to buy things--in our case tickets)
BEHAVIOR MANAGEMENT:
Idea #2
So while the above idea was doing well... at training I found about CLASSROOM DOJO .... an app that can be downloaded on your tablet or smart phone (IOS and Android) I have it on my Ipad and Samsung Phone! So once you create an account (its FREE) you can set your class in. It allows you to add behaviors you want to watch/assess- positive and negative. It is easy, fun and tends to get their attention when a friend is clicking in their Dojo points. Also it has parental log in (parents get access code) which allows them to access their child's behavior report. So we gave up the boxes and are doing classroom Dojo.
I set up 6 positive and 6 negative behaviors. While Positive behavior gives them a point, negative ones takes away one. Kiddos are trying hard to keep up with positive points. We must have barely clicked negative for a child or 2 ....maybe once. We are earning weekly 15 points in order to get to treasure box on Friday :) It keeps counting up.... so while week one had 15 as aim, in week 2 our aim was to get to the number 30 and so on. I display the number up somewhere around our carpet for them to remember.
So this has been the beginning of the year...I know I am way behind.... but I intend to catch up..... Weekly theme ideas to start soon!
Until next time,
Happy Teaching,
Cheers =)
So this has been the beginning of the year...I know I am way behind.... but I intend to catch up..... Weekly theme ideas to start soon!
Until next time,
Happy Teaching,
Cheers =)


